
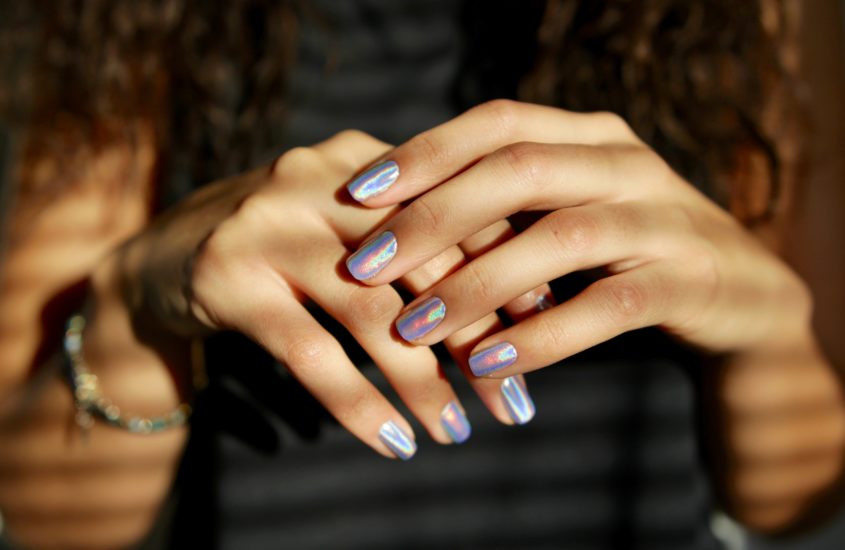
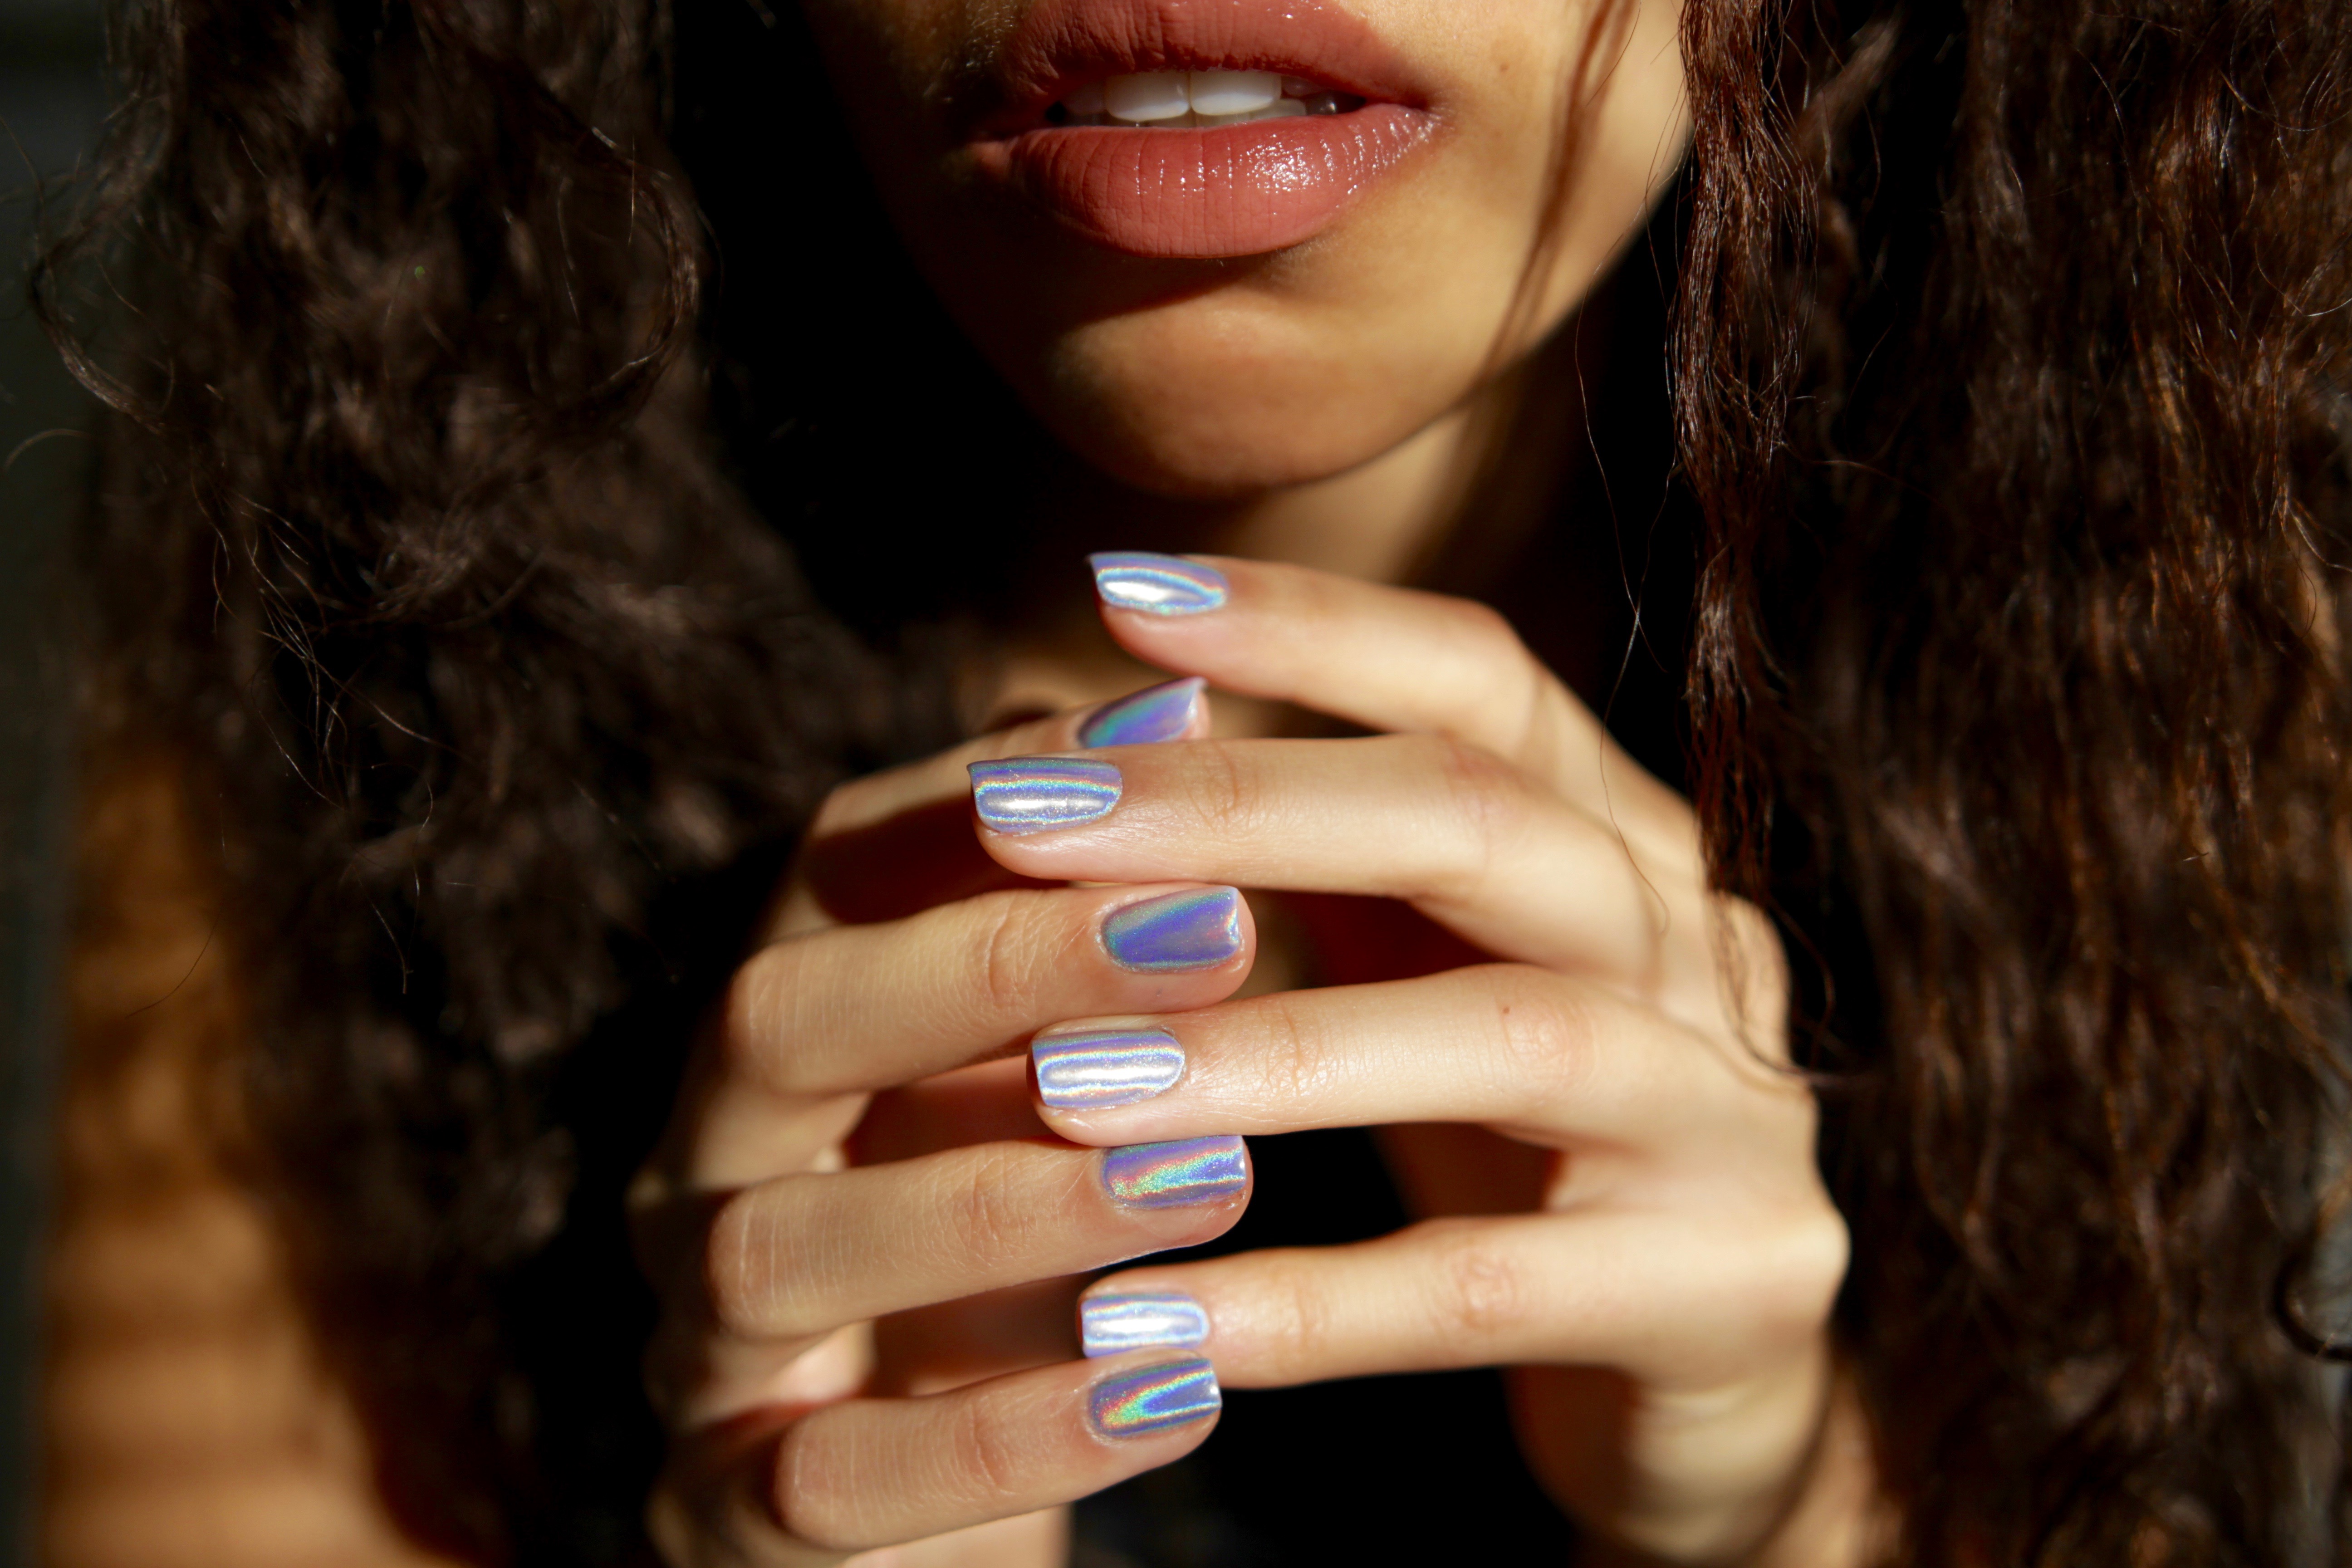
Holographic Nails
If you’ve been keeping up with Just Peachy, I did a post called Chrome Nails and I promised you a post about holographic nails. That day has come!
I purchased chrome pigment from Ocean Nail Supply and after being amazed with the results, I had to go back for more…but for holo. For those of you who don’t know how this product works, it’s a pigment powder that can be applied on top of any light cured polish of choice.

Follow these steps for a flawless, lasting set of holographic nails:
- Step 1: Prep nails thoroughly (as normal).
- Step 2: Apply base. Cure 30 seconds.
- Step 3: 2 coats of color. Cure 30 seconds/coat. I find that brighter neons (pinks, blues, oranges) look amazing underneath the pigment.
- Step 4: Apply 1 coat of Gossip Gel from Ocean Nail Supply. Cure 30 seconds.
- Step 5: Apply holographic pigment thoroughly with a brush or makeup sponge to each nail. Do not cure, or wipe. Click here for tutorials.
- Step 6: This step is optional. Apply a thin layer of soak off clear gel (I use Gelish Structure Gel). I like to do this step for extra protection and strength. Cure 30 seconds.
- Step 7: Seal with top coat. Cure 30 seconds.
For my set (as seen above) I applied a periwinkle color as the base called “Aim to Chill” by Artistic Color Gloss . One thing I will say about holo pigment is that it changes in different lighting. There are times when I catch my nails looking icy blue, or slate grey, and SUPER holo in direct sunlight. #mesmerizing
Is this a look you’d try?

![]()


Sierra
Yes I want to try this!!! I’m mad I cant do this myself though!
chia
Haha! It’s seriously cool, but it should be done by a professional, especially if it’s pigment and not just a powder. Find yourself a local salon =)!
Isis Araujo
Love it!
chia
Thank You!